Traditional water heaters have long been a staple in residential homes, but on-demand water heaters, also known as tankless water heaters, are gaining popularity. These modern units provide hot water only when needed, eliminating the need for a large storage tank. Unlike conventional water heaters that continuously heat and store water, on-demand systems activate only when a faucet is turned on. This innovation leads to several benefits, including increased energy efficiency and a constant supply of hot water. Homeowners seeking cost-effective and sustainable solutions are increasingly turning to these systems.
How On-Demand Water Heaters Work
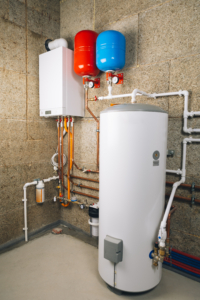
The operation of an on-demand water heater is relatively simple yet highly effective. When a hot water tap is opened, cold water travels through a pipe into the unit. A gas burner or electric element then rapidly heats the water, delivering a continuous flow of hot water. Because there is no need to store water, these systems avoid the standby energy losses associated with traditional water heaters. The result is a highly efficient process that provides hot water on demand without unnecessary energy consumption. However, the flow rate may be limited, requiring homeowners to choose the right size for their needs.
Gas vs. Electric On-Demand Water Heaters
On-demand water heaters come in both gas and electric models, each with its own advantages and disadvantages. Gas-powered units tend to provide a higher flow rate and are better suited for households with high hot water demand. However, they require proper venting and may have higher installation costs. Electric models, on the other hand, are more energy-efficient, easier to install, and require less maintenance. Homeowners must consider their household needs, budget, and available energy sources when selecting the right system.
Unlimited Hot Water Supply
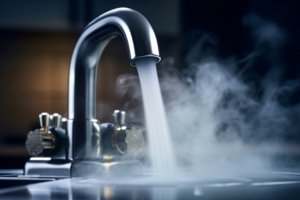
One of the most appealing features of on-demand water heaters is their ability to provide an unlimited supply of hot water. Unlike storage tank heaters that can run out of hot water after prolonged use, tankless systems heat water as it flows through the unit. This means homeowners never have to worry about running out of hot water while showering or doing laundry. However, the unit’s capacity must be considered, as a single unit may struggle to provide hot water simultaneously for multiple high-demand activities.
Energy Efficiency and Cost Savings
One of the most significant advantages of on-demand water heaters is their energy efficiency. Traditional water heaters continuously heat water, which leads to energy loss over time. In contrast, on-demand water heaters only operate when needed, reducing overall energy consumption. According to the U.S. Department of Energy, tankless water heaters can be 24–34% more energy-efficient for homes that use less than 41 gallons of hot water daily. Over time, this efficiency translates into lower utility bills, making these systems a smart investment for many homeowners.
Space-Saving Benefits
Another major advantage of on-demand water heaters is their compact size. Traditional water heaters typically require a large tank that can take up significant space in a utility room or basement. On-demand systems, on the other hand, are small and can be mounted on walls, freeing up valuable floor space. This makes them an excellent choice for apartments, smaller homes, and even outdoor installations. The reduced footprint allows homeowners to utilize their living spaces more efficiently without sacrificing hot water availability
Maintenance and Longevity
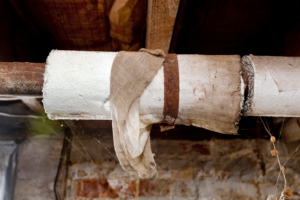
On-demand water heaters generally have a longer lifespan than traditional storage tank models. While a conventional water heater lasts around 10–15 years, a tankless unit can last up to 20 years or more with proper maintenance. Regular descaling and flushing are recommended to prevent mineral buildup, particularly in areas with hard water. Gas-powered models may also require periodic inspections to ensure burner efficiency and proper ventilation. With routine maintenance, these systems provide long-term reliability and performance.
Potential Drawbacks and Limitations
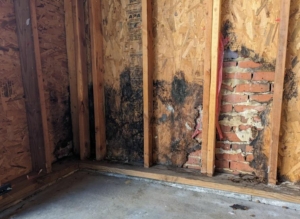
Despite their numerous benefits, on-demand water heaters have some potential drawbacks. The most notable is the limited flow rate, which may struggle to supply multiple fixtures simultaneously. If too many appliances demand hot water at once, users may experience fluctuations in temperature. Additionally, the initial cost and installation complexity may deter some homeowners. Understanding these limitations helps homeowners make informed decisions when considering a switch to an on-demand system.
Choosing the Right Model for Your Home
Selecting the right on-demand water heater requires careful consideration of household hot water needs. Factors such as family size, number of bathrooms, and simultaneous appliance usage should be evaluated. Flow rate and energy source are also critical considerations, as some models are better suited for high-demand homes. Consulting a professional can help homeowners determine the ideal system size and type for their specific needs. Choosing the right model ensures optimal performance and long-term savings.
Conclusion: A Smart Choice for Modern Homes
On-demand water heaters represent a modern and efficient alternative to traditional water heating methods. Their energy efficiency, space-saving design, and continuous hot water supply make them an appealing choice for homeowners. Although the initial investment may be higher, the long-term savings and sustainability benefits outweigh the costs. With proper selection, installation, and maintenance, on-demand water heaters can provide reliable hot water for many years. As energy efficiency becomes a priority for households, these innovative systems are likely to become the new standard in residential water heating.


")