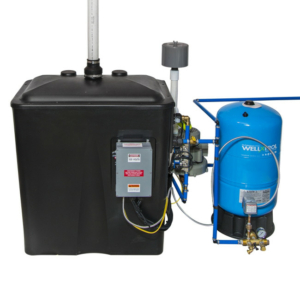
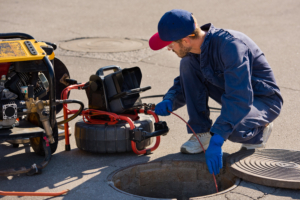
What is Well Flow Testing?
A well flow test is about examining how much water your private well can pump to the system of your home. Checking the maximum and minimum range is essential to know how much water your well can safely pump to your home system. Some factors are considered to check the water flow level. They are:
- Duration
- Flow rate
- Pressure range
- Switch intervals
- Well depth
Further, there is a fixed formula to determine a well’s accurate water flow level. Two elements are very important in the formula. First, its necessary to gather information about the time for which the pump is running. Also, keep a note about the quality of water (in gallons) the pump is drawing.
The flow rate can then be measured by dividing the water drawn by the pump (in gallons) by the operation cycle of the pump (in seconds). This result is again multiplied by 60 to get the result about the well’s gallons per minute or GPM water flow. So, the formula is:
(Gallons of water drawn by the pump/Number of seconds the pump was on)*60
You can hire a reliable and specialized company to check your well’s water flow.
What is a Good Well Flow Rate?
The more, the merrier! On a serious note, let’s be practical as the natural water resources, especially groundwater levels, will differ across various geographical locations. So, a universal standard cannot be set regarding a good well water flow rate. Nevertheless, a 3 GPM water flow is decent for private wells in households. However, a well’s water flow is usually considered good when it is 5 gallons per minute or above.
If your well water flow rate is low, a technician can help you improve the flow. The problem can be solved by installing a booster pump, a constant pressure system, or adjusting the pressure tank settings. You can also receive suggestions like widening the borehole or drilling the well deeper.
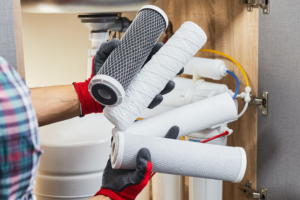
What is Well Water Quality Testing?
The water flow rate of your well determines whether your household system is receiving adequate water supply or not. On the other hand, water quality testing assesses the water quality indicators and contaminants in your well water. This is very important to ensure that your water is safe to drink and wash with. Good water quality also ensures that that the appliances connected to the water source can function well and have a decent shelf life. In addition, quality testing also helps you to obtain necessary guidance from your local health and environment department if contaminants are detected.
What are Water Quality Indicators?
Some water quality indicators checked during water testing are the pH level, total coliforms, and fecal coliforms. If your well water has high levels of total coliforms, there is a high chance that harmful elements like viruses, bacteria, and other parasites are present in the water. Further, a higher presence of fecal coliforms hints at the existence of germs causing hepatitis, diarrhea, and dysentery.
In addition, a high pH level in your water can damage your house’s appliances and plumbing systems. Moreover, it can yield some adverse health effects.
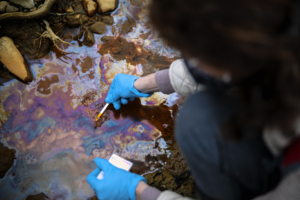
What are the Water Contaminants?
The United States Environmental Protection Agency (EPA)says that the highest permissible level of nitrate in drinking water is 10mg/L. Maintaining this nitrate level is important for avoiding severe health problems like the blue-baby syndrome. If your well water has more nitrate than the permissible level, it will be considered contaminated.
Volatile Organic Compounds (VOC) derived from “industrial fuel-related chemicals” can also contaminate your well water if your house is close to industrial areas. Some of these organic compounds are:
- Carbon tetrachloride
- Benzene
- Toluene
- Methyl tertiary butyl ether
- Trichloroethelene, etc.
Your well water can get further contaminated by harmful minerals like arsenic, lead, radium, mercury, and atrazine. Moreover, there are many instances of pesticide and germ contamination in well water.
If the inspection report says that your well water is contaminated, you must seek help from the local health or environmental department. You can also contact EPA to seek necessary guidance on the measures to be taken.
RELATED ARTICLE:ARSENIC, URANIUM, & VOCS IN WATER

Why Should I Test My Well Water?
You should get your well water tested because consuming contaminated water or being in contact with polluted water can cause instant or future health problems. Problems like diarrhea and dysentery are common health implications caused by contaminated water. Further, the harmful minerals and chemicals in the water can cause severe damage to your skin, hair, nails, and internal organs.
You need to be more particular about your well water quality testing if you have children, pregnant women, elderly persons, or people suffering from chronic diseases at home. Regular testing of your well water is the most effective way to ensure that your well water is safe for use.
How Can I Get My Well Water Tested?
Your state’s local health and environmental department will usually conduct examinations to check the levels of water quality indicators. Further, you will find a detailed list of certified laboratories for water testing in your area on your state’s official website of the Department of Public Health.
What is the Right Time to Have My Well Tested?
The Centers for Disease Control and Prevention recommends water testing yearly during spring. However, you must make arrangements for well water testing immediately if you experience any change in the water’s taste, smell, or color. Further, immediate testing is imperative if there are reports about well water problems in your area.
Your well water should also be immediately tested after any repairing work on the well equipment. Additionally, any land disturbance or waste disposal near your well should call for immediate water testing.
What is the Cost of Well Water Testing?
The cost of well water testing may differ based on the test being conducted. For example, the cost of a test for checking arsenic levels will be different from bacteria-determinant tests. On average, well water testing will cost you somewhere between $100 to $750.
Final Words:
If the inspection report of your well water is not satisfactory, or your well water fails inspection, it is imperative that you follow measures as guided by the technician. In cases of a failed inspection, cleaning the well, evacuating the well, changing the pump and other equipment, UV treatment, etc., are recommended. If the condition of your well water is beyond improvement, the technician will advise you to have a new well drilled.


")